COLS365 Mobile Application (Backend)
USER MANUAL
Manufacture & Distributor Mobile App
HOW TO INSTALL COLS365 DISTRIBUTOR APPS:
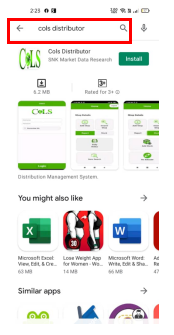
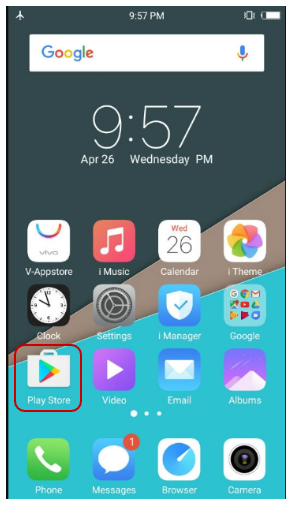
Step 1: GO TO YOUR MOBILE PLAY STORE

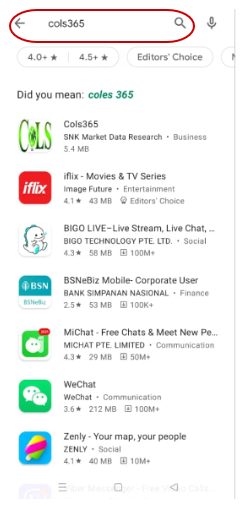
Step 2: TYPE COLS DISTRIBUTOR ON SEARCH BAR

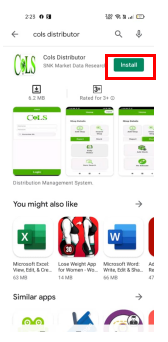
Step 3: INSTALL THE COLS DISTRIBUTOR APPS

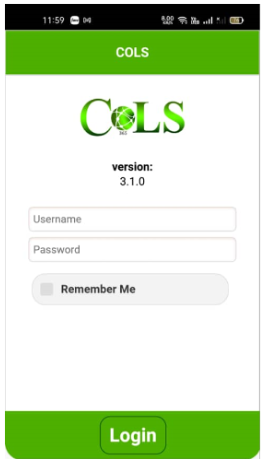
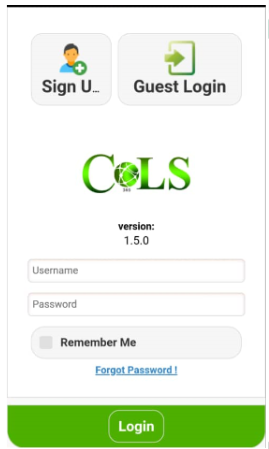
HOW TO LOG IN ON COLS365 DISTRIBUTOR APPS:
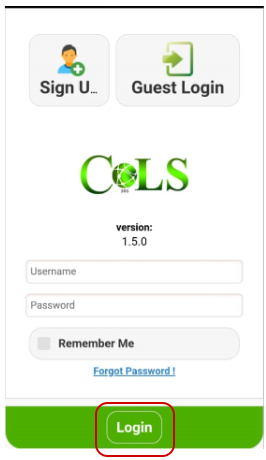
Step 1: Enter your email add [username] and password,
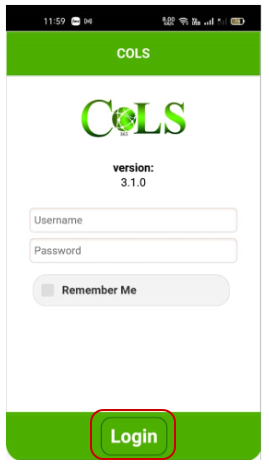
Step 2: Click Log-In Button.
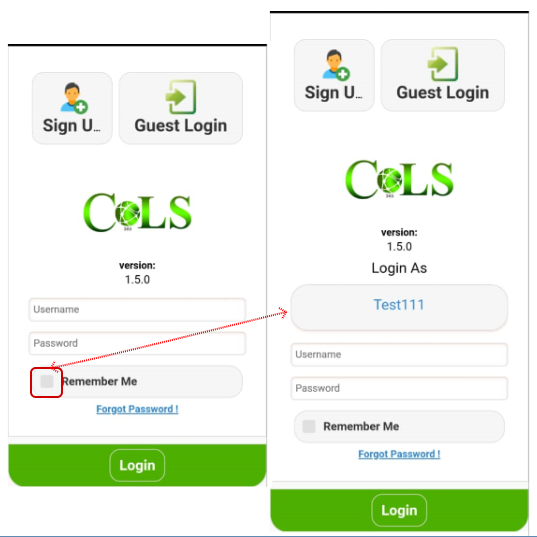
Note: If you want to remember your account click the box beside remember me. So that next log-in you will click only your name to log-in.

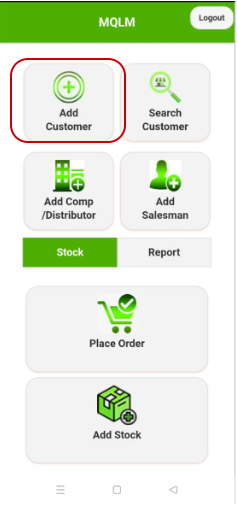
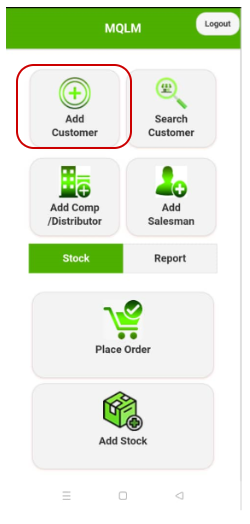
HOW TO ADD CUSTOMER ON COLS365 DISTRIBUTOR APPS:
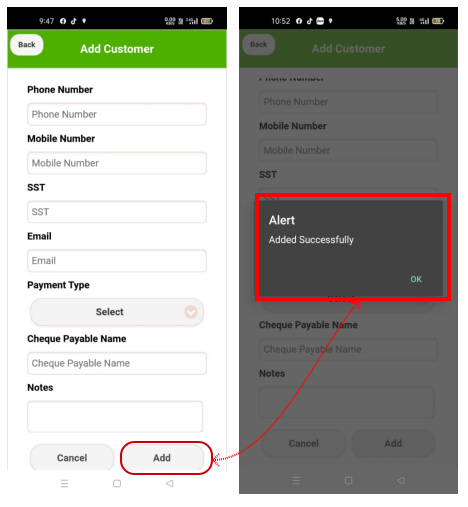
Step 1: Click Add Customer on home page
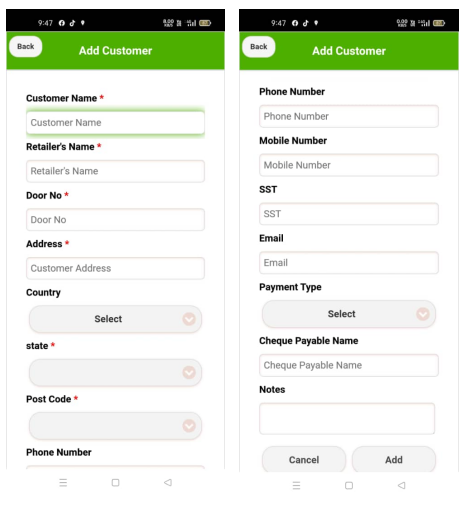
Step 2: Fill up all necessary details of your customers.
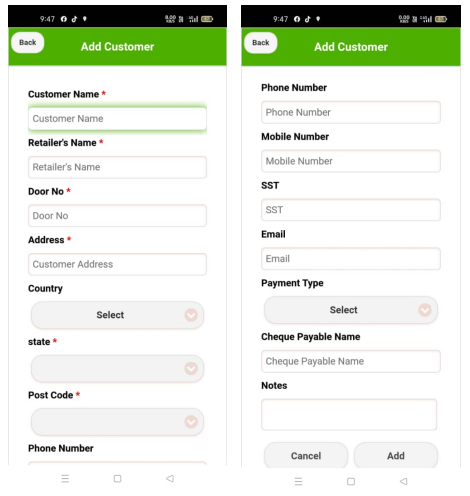
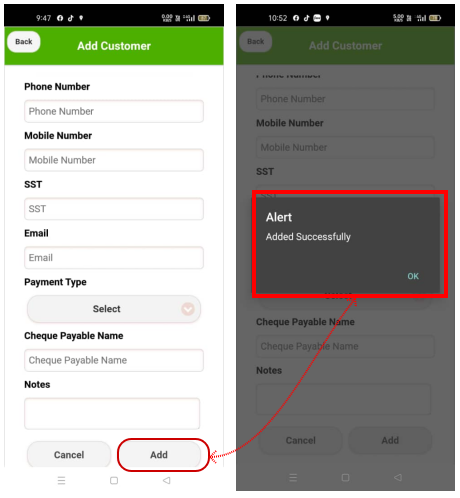
Step 3: Click Add Button And pop-up message appear “Added Successfully” then click ok.
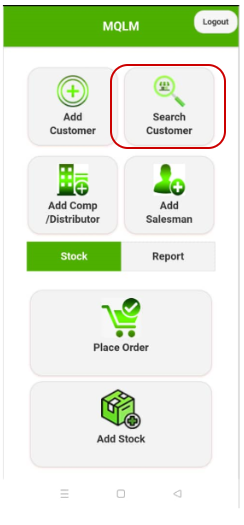
HOW TO SEARCH CUSTOMER ON COLS365 DISTRIBUTOR APPS:
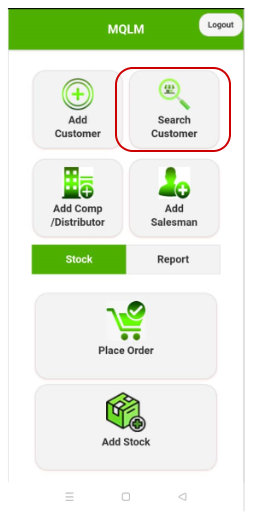
Step 1. Click Search Customer on home page.
Step 2: Click dropdown and select whether you want to search by retailer name, customer name, city, address, account ID or postcode.

Step 3: Type whether you search by retailer name, customer name, city, address, account ID or postcode on the search bar.

Step 4: Click search button.

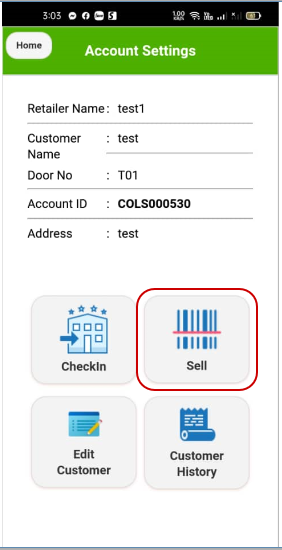
HOW TO SELL ITEM ON YOUR CUSTOMER:
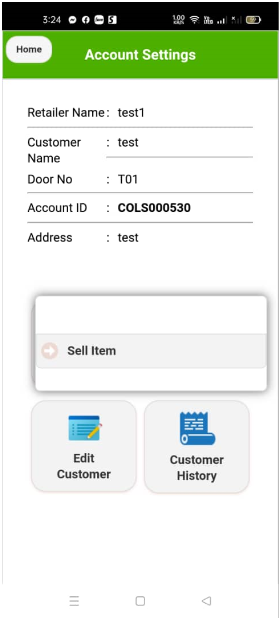
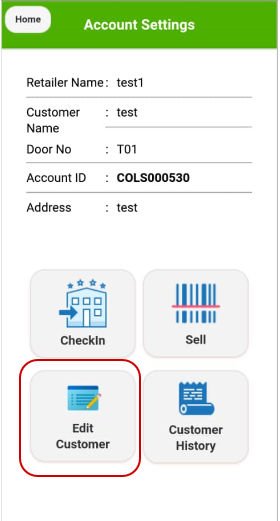
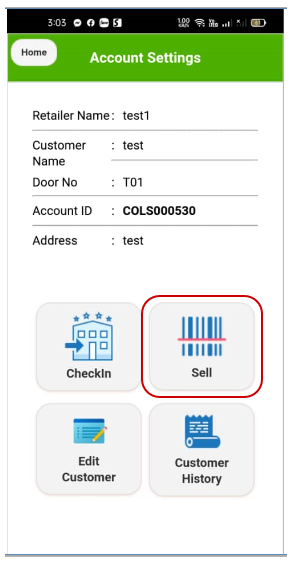
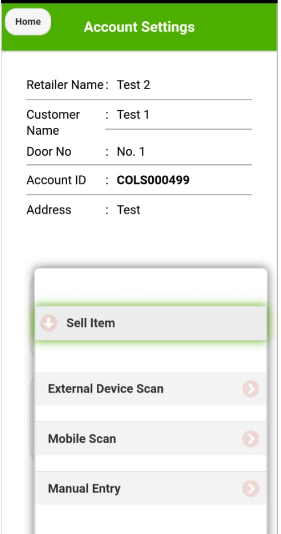
Step 1: After you search your customer, click it to view the account settings page.

Step 2: Click the CheckIn button once you are in the shop already. And the pop-up message will appear “CheckIN Success” then click ok. Note: Check-IN used if you deliver an item on the shop.

Step 3: Click the Sell button to record the items you want to sell/deliver on your specific customer.
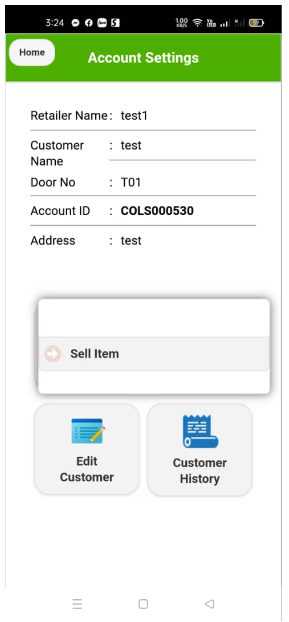
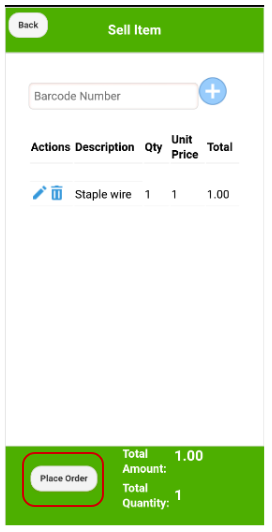
Step 4: Click Sell Item.
Step 5: Select what do you prefer to record your items [external device scan, mobile scan, manual entry.

USING EXTERNAL DEVICE SCAN:
If have own barcode scanner connected on your device, you select external device scan. Scan the barcode item and it will show the items details that you currently scan.

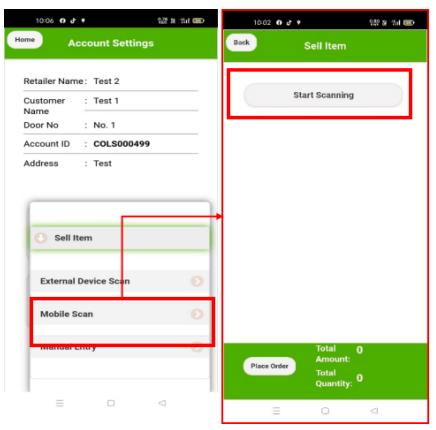
USING MOBILE SCAN:
A. Once you select mobile scan, it will show you to start scanning button.
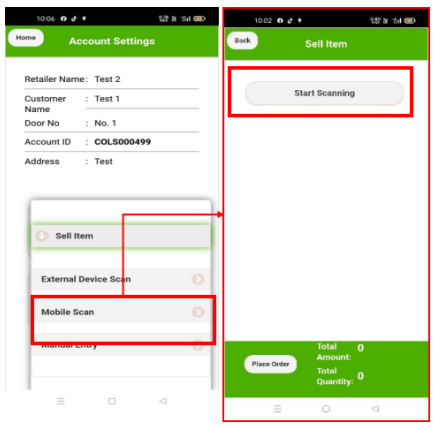
B. Click start scanning button and you can scan the barcode of the item and then it will appear the item details.

USING MANUAL ENTRY:
Once you select manual entry, you need to key-in the item barcode. Then item details will appear.

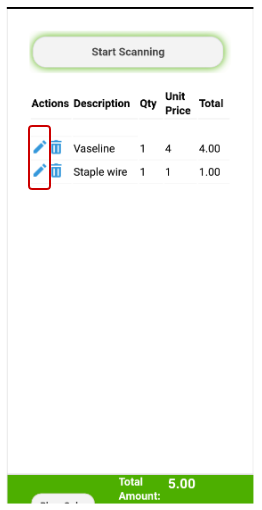
Step 6: Click pen icon if you want to change the quantity and price of the items that you want to sell on the shop.
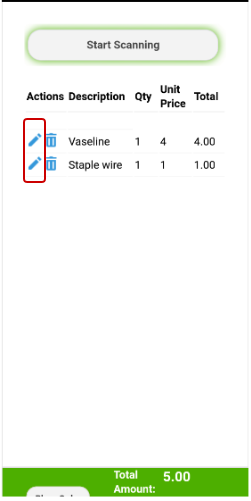
Note: the edit Option will be available only if the user have View permission for `Distributor Mobile App --> Search Customers -->Sell --> Edit Price (V)` In Permission Page.
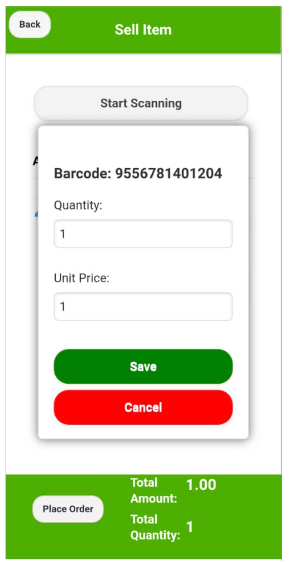
Step 7: Input the quantity and price of the item then click save button
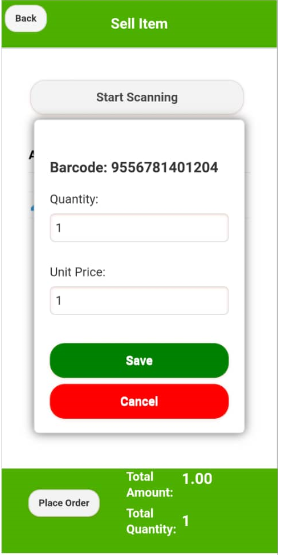
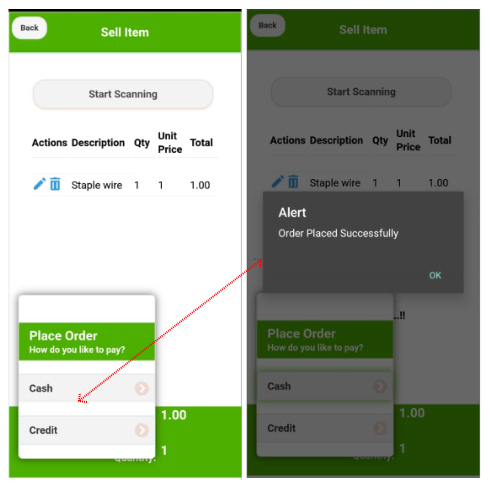
Step 8: Now you can proceed to click place order button.
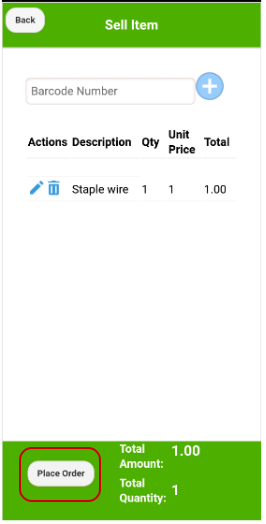
Step 9: Select customer payment method “Cash or Credit”. Then pop-up message appears “Order Place Successfully”.

Note: All items that you sell on your customers will appear on your received orders either pay cash or credit.
HOW TO EDIT CUSTOMER DETAILS:
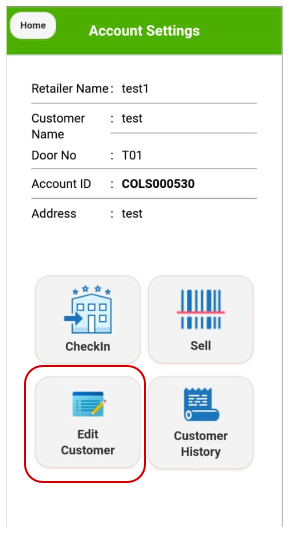
Step 1: After you search your customer, click it to view the account page settings.
Step 2: Click the Edit Customer button once you need to update the customer details.
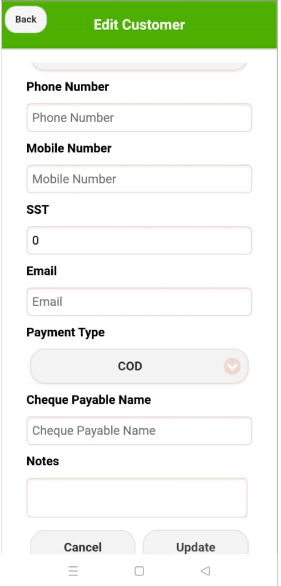
Step 3: Update the specific customer details need to change.
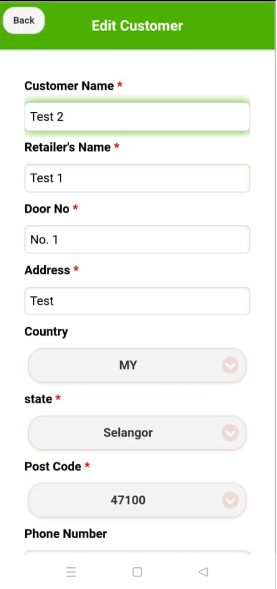
Step 4: Then click the update button.
HOW TO VIEW CUSTOMER HISTORY:
Step 1: After you search your customer, click it to view the account page settings.
Step 2: Click the customer history button. Customer history will show the received orders page.

You can review the details and status of the item once you click it. You can see the remarks/history of the item and can view/print the bill (click Thermal Print button), invoice (click invoice report button) and sell button.

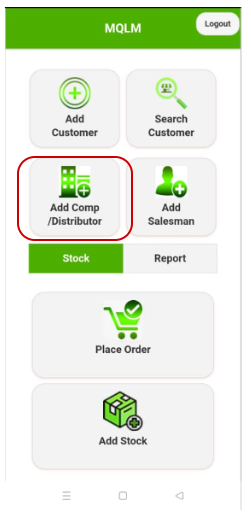
HOW TO ADD COMPANY/DISTRIBUTOR:
Step 1. Click the Add Comp/Distributor button if you have an additional company/distributor.
Step 2: Fill up the form.
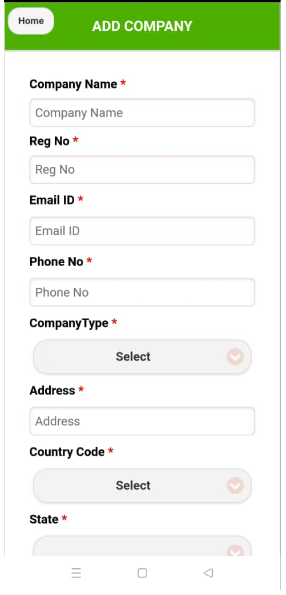
Step 3: Click Add button. Then a pop-up message appears “Company Added Successfully”.

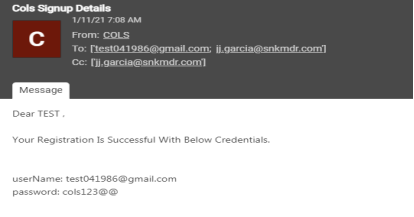
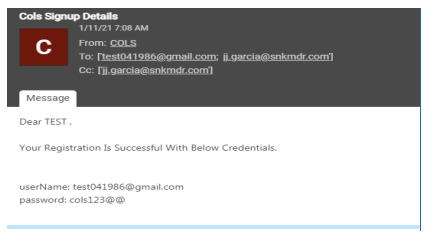
Step 4: Check your email to get the confirmation of registration of your additional company/distributor.
HOW TO ADD SALESMAN:
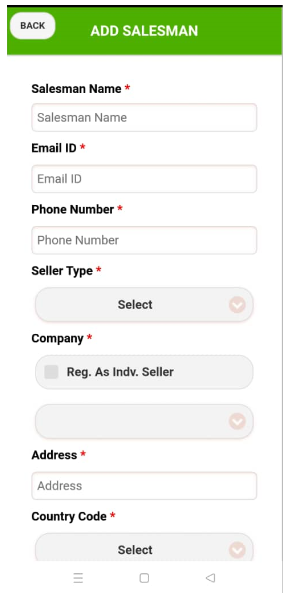
Step 1. Click add Salesman button if you have an additional salesman for your item.

Step 2: Fill up the form.
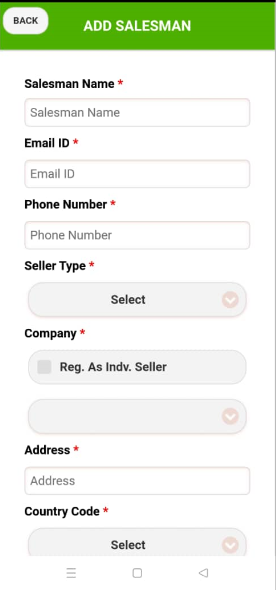
Step 3: Click Add button. Then a pop-up message appears “Salesman Added Successfully”.

Note: Click the box besides the Reg. as Individual seller if your salesman is an individual seller.
Step 4: Check your email to get the confirmation of registration of your additional salesman.
HOW TO PLACED AN ORDER:
Step 1. Click the Place Order button to purchase an item. Then it will show you the webportal home page.

Step 2. Click the manufacturer/distributor Shop Now button to view all the shop on manufacturer/distributor.

Step 3. Click the manufacturer/distributor Shop to view all the items.

Step 4. Choose an item you want to purchase and type the quantity on the box.

Step 5. Click add to cart button.

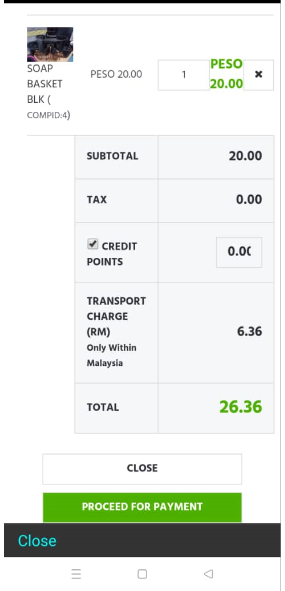
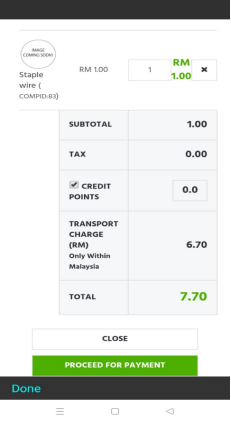
Step 6: Click MY CART button to view the order review page.
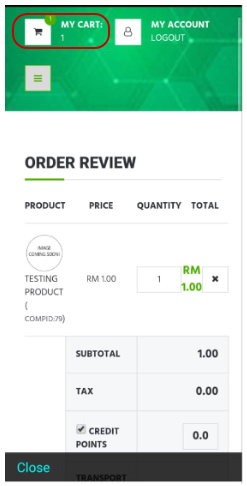
Step 7: Choose your preferred payment method either credit [click cash/consignment button] or pay now [click proceed for payment button].
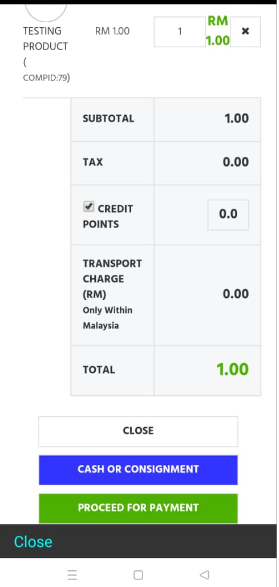
Note: If you want to go back on the mobile apps home page, just click close.

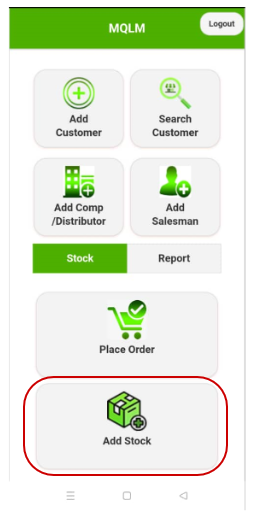
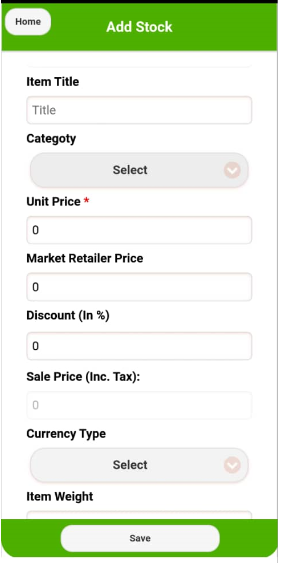
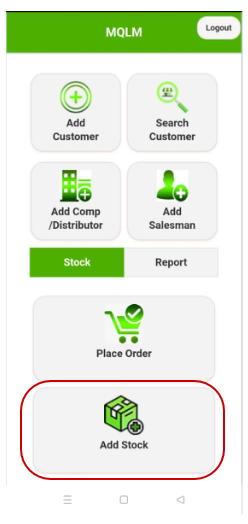
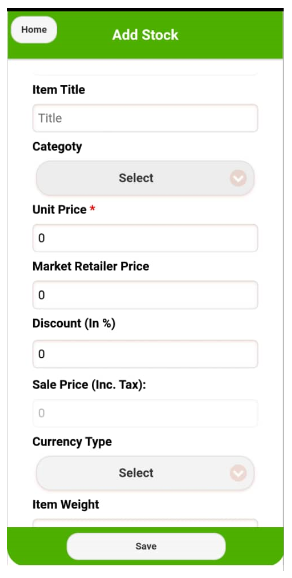
HOW TO ADD A STOCKS:
Step 1. Click add Stocks button to add your item stocks.
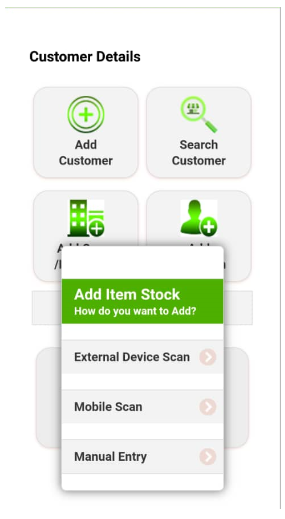
Step 2: Select what do you prefer to record your items.
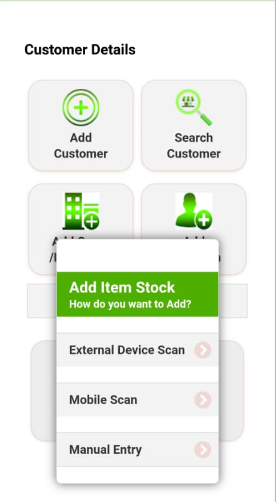
Step 3: If you have own barcode scanner, select external device scan. Once you scan the item barcode, item details will show.
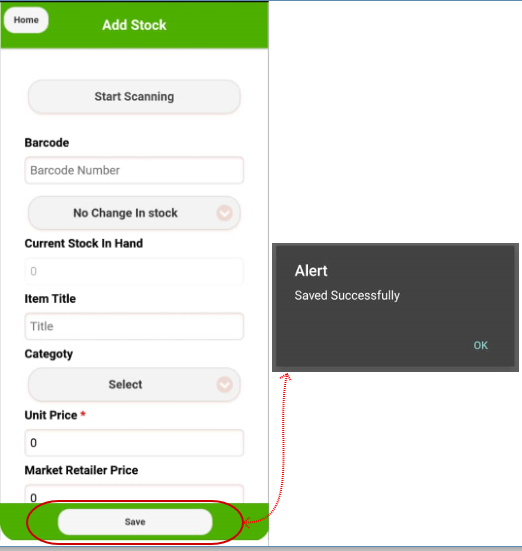
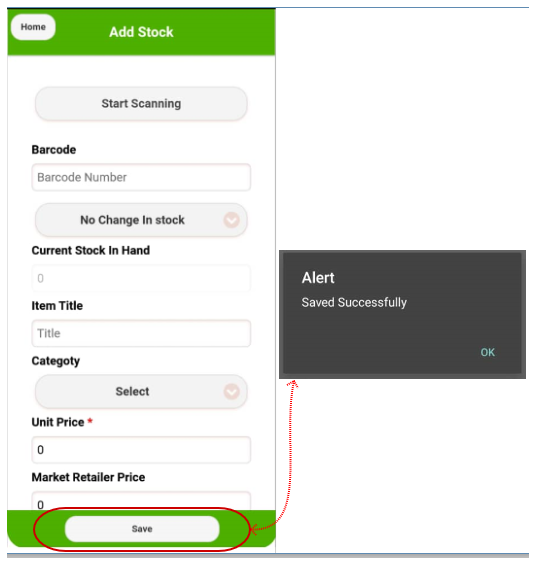
Once you select mobile scan, it will show you the start scanning button.

Click start scanning button and you can scan the barcode of the item and then it will appear the item details.

Then incase you need to add stocks can select update Portal Stocks and can update the quantity and other details. Incase no changes in stock by default it is select no changes in stock and you can edit other details as well.

Once you select a manual entry, you need to key-in the item barcode. Then item details will appear. Then incase you need to add stocks can select update Portal Stocks and can update the quantity and other details. Incase no changes in stock by default it is select no changes in stock and you can edit other details as well.

Step 4: Once done click Save and pop-up message appear “Saved Successfully” then click ok.
Seller Mobile Apps
HOW TO INSTALL COLS365 DISTRIBUTOR APPS:
Step 1: GO TO YOUR MOBILE PLAY STORE

Step 2: TYPE COLS DISTRIBUTOR ON SEARCH BAR
Step 3: INSTALL THE COLS DISTRIBUTOR APPS
HOW TO LOG IN ON COLS365 DISTRIBUTOR APPS:
Step 1: Enter your email add [username] and password,
Step 2: Click Log-In Button.
Note: If you want to remember your account click the box beside remember me. So that next log-in you will click only your name to log-in.

HOW TO ADD CUSTOMER ON COLS365 DISTRIBUTOR APPS:
Step 1: Click Add Customer on home page
Step 2: Fill up all necessary details of your customers.
Step 3: Click Add Button And pop-up message appear “Added Successfully” then click ok.
HOW TO SEARCH CUSTOMER ON COLS365 DISTRIBUTOR APPS:
Step 1. Click Search Customer on home page.
Step 2: Click dropdown and select whether you want to search by retailer name, customer name, city, address, account ID or postcode.

Step 3: Type whether you search by retailer name, customer name, city, address, account ID or postcode on the search bar.

Step 4: Click search button.

HOW TO SELL ITEM ON YOUR CUSTOMER:
Step 1: After you search your customer, click it.

Step 2: Click the CheckIn button once you are in the shop already. And the pop-up message will appear “CheckIN Success” then click ok. Note: Check-IN used if you deliver an item on the shop.

Step 3: Click the Sell button to record the items you want to sell/deliver on your specific customer.
Step 4: Click Sell Item.
Step 5: Select what do you prefer to record your items [external device scan, mobile scan, manual entry.
USING EXTERNAL DEVICE SCAN:
If have own barcode scanner connected on your device, you select external device scan. Scan the barcode item and it will show the items details that you currently scan.

USING MOBILE SCAN:
A. Once you select mobile scan, it will show you to start scanning button.
B. Click start scanning button and you can scan the barcode of the item and then it will appear the item details.

USING MANUAL ENTRY:
Once you select manual entry, you need to key-in the item barcode. Then item details will appear.

Step 6: Click pen icon if you want to change the quantity and price of the items that you want to sell on the shop.
Note: the edit Option will be available only if the user have View permission for `Distributor Mobile App --> Search Customers -->Sell --> Edit Price (V)` In Permission Page.
Step 7: Input the quantity and price of the item then click save button
Step 8: Now you can proceed to click place order button.
Step 9: Select customer payment method “Cash or Credit”. Then pop-up message appears “Order Place Successfully”.
Note: All items that you sell on your customers will appear on your received orders either pay cash or credit.
HOW TO EDIT CUSTOMER DETAILS:
Step 1: After you search your customer, click it.

Step 2: Click the Edit Customer button once you need to update the customer details.
Step 3: Update the specific customer details need to change. Then click the update button.

HOW TO VIEW CUSTOMER HISTORY:
Customer history will show the received orders. All the items you sold is here.

You can review the details and status of the item once you click it. Same with web portal you can see the remarks/history of the item and can view/print the bill (click POS button) and invoice (click invoice report button).

HOW TO ADD SALESMAN:
Step 1. Click add Salesman button if you have an additional salesman for your item.

Step 2: Fill up the form.
Step 3: Click Add button then pop up message appear “Salesman Added Successfully”.

Note: Check Reg. as Individual seller if your salesman is not under your company.
Step 4: Check your email to get the confirmation of registration of your additional salesman.
Note: Seller not allowed to add company/distributor
HOW TO PLACED ORDER:
Step 1. Click the Place Order button to purchase an item. Then it will show you the web portal home page.

Step 2. Click the distributor Shop Now button to view all the distributors/seller shops.

Step 3. Click the distributor/seller Shop to view all the items.

Step 4. Choose item you want to purchase and type the quantity on the box.

Step 5. Click add to cart button.

Step 6: Click MY CART button to view the order review page.

Step 7: Click Proceed for payment button.
Note: If you want to go back on the mobile apps home page, just click close.

HOW TO ADD STOCKS:
Step 1. Click add Stocks button to add your item stocks.
Step 2: Select what do you prefer to record your items.
Step 3: If you have own barcode scanner can select external device scan. Once you scan the item barcode, item details will show.
Once you select mobile scan, it will show you to start scanning button.

Click start scanning button and you can scan the barcode of the item and then it will appear the item details.

Then incase you need to add stocks can select update Portal Stocks and can update the quantity and other details. Incase no changes in stock by default it is select no changes in stock and you can edit other details as well.

Once you select a manual entry, you need to key-in the item barcode. Then item details will appear. Then incase you need to add stocks can select update Portal Stocks and can update the quantity and other details. Incase no changes in stock by default it is select no changes in stock and you can edit other details as well.

Step 4: Once done click Save and a pop-up message appear “Saved Successfully” then click ok.
Customer Mobile App
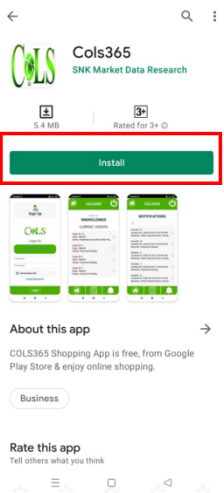
HOW TO INSTALL COLS365 APPS:
Step 1: GO TO YOUR MOBILE PLAY STORE
Step 2: TYPE COLS365 ON SEARCH BAR
Step 3: INSTALL THE COLS365 APPS
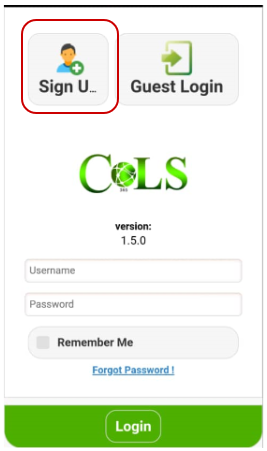
HOW TO REGISTER ON COLS365 MOBILE APPS:
Step 1: Click sign-up button to register.
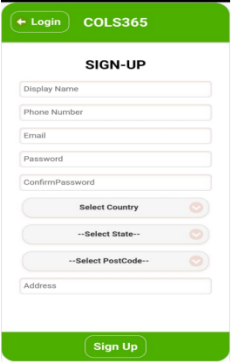
Step 2: Fill up the sign up page.
Step 3: Click the sign-up button and pop up message appear “Success!”
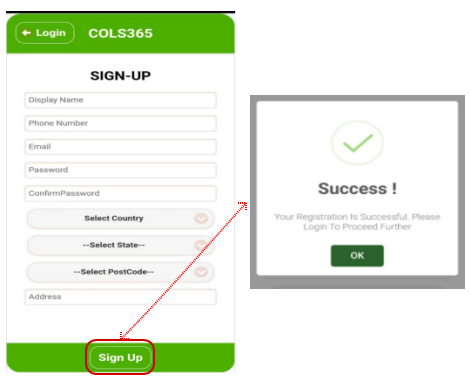
Note: If you register already on COLS365.com, just proceed on log-in.
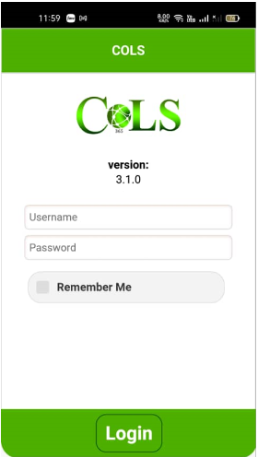
HOW TO LOG-IN ON COLS365 MOBILE APPS:
Step 1: Enter your email add [username] and password,
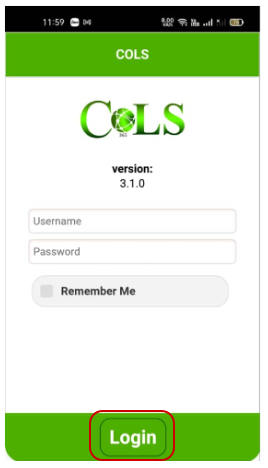
Step 2: Click Log-In Button.
Note: If you want to remember your account click the box beside remember me. So that next log-in you will click only your name to log-in.
HOW TO PLACE ORDER USING MOBILE APPS:
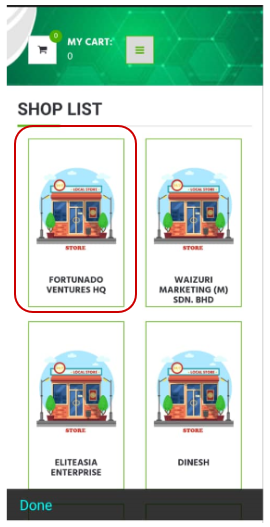
Step 1: Once you log in, it will direct you on web portal home page. Then click the shop you want to visit.
Step 2: Choose the item you want to purchase and type the quantity on the box.
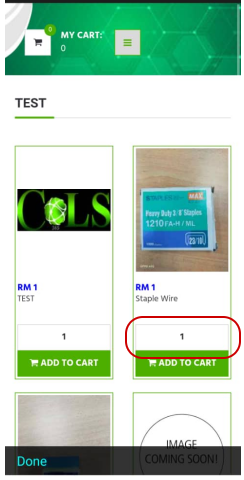
Step 3: Click add to cart button.
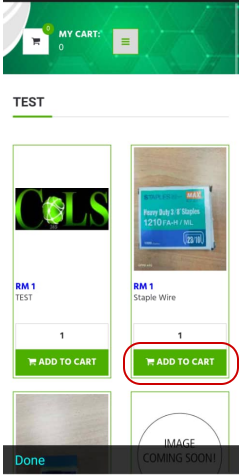
Step 4: Click the MY CART button to view the order review page.
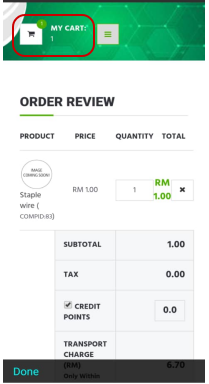
Note: CUSTOMER can review also the item ordered before click proceed for payment button. If you want to add the item quantity just type the number on the box. Then incase you want to remove an item on MY CART just click X button.
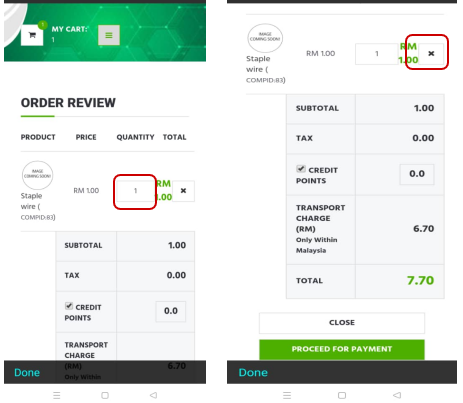
Step 5: Click Proceed for payment button.
Note: Guest cannot proceed on payment must register first.
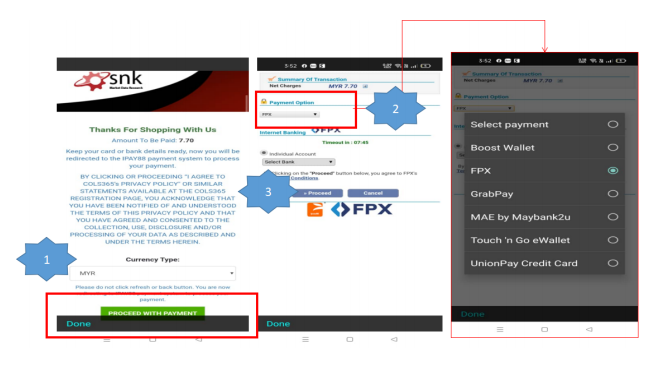
HOW TO PAY USING IPAY88:
Step 1: Click Proceed with payment button.
Step 2: Select payment option do you prefer.
Step 3: Click Proceed Button to do payment.
HOW TO VIEW PRODUCT BY CATEGORY:
Step 1: Customers can view the product by category. Just click this button to view the menu page.
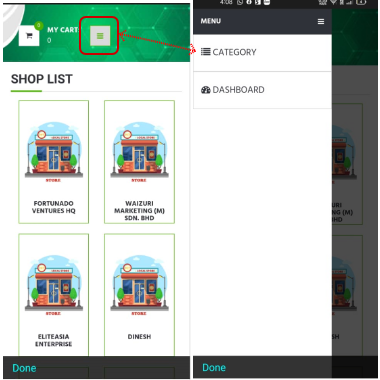
Step 2: Click the category button and it will show all the item categories.
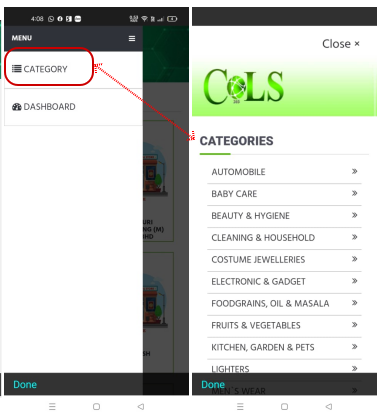
Step 3: Select the item CATEGORY you want to view.
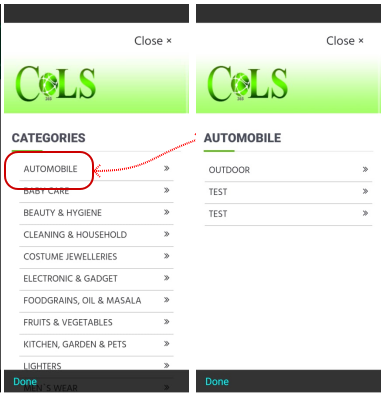
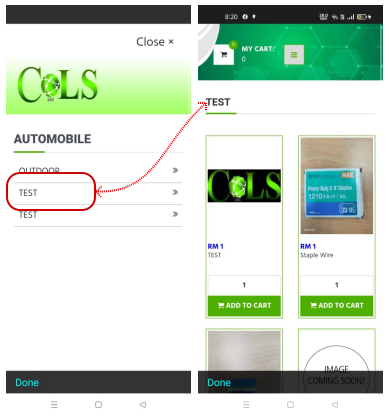
Step 4: Select the sub-category to view the items.
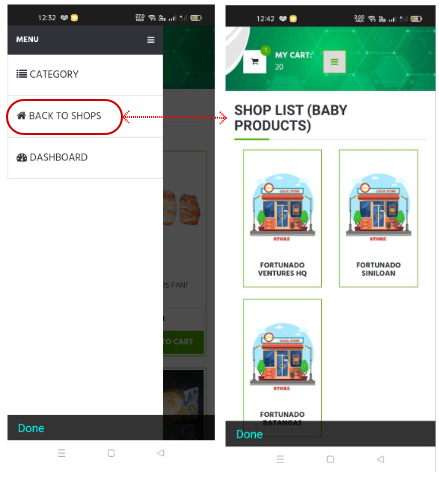
NOTE: BACK TO SHOPS button is to go back on the shop list under the specific category and Incase you want to go back on SHOP LIST just click the DASHBOARD button and then click SHOP NOW button to go back on SHOP LIST.
FUNCTION OF DASHBOARD:
Step 1: Customers can view the dashboard. Just click this button to view the menu page.
Step 2: Click the dashboard button.
DASHBOARD PAGE shows Account Details and Placed Order Details. On this page, you can view the summary details of placed orders.
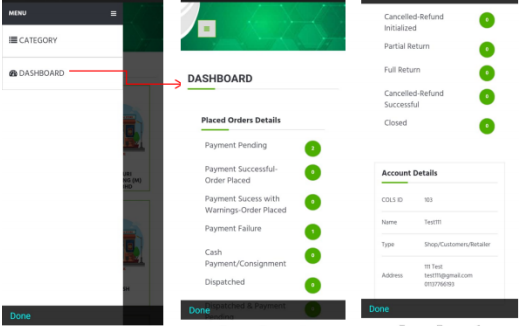
To view the summary details of placed orders, just click the green button on right side of respective placed orders details you want to view.
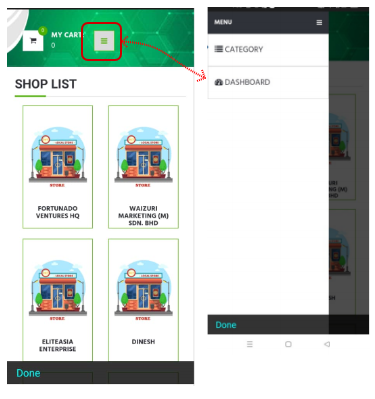
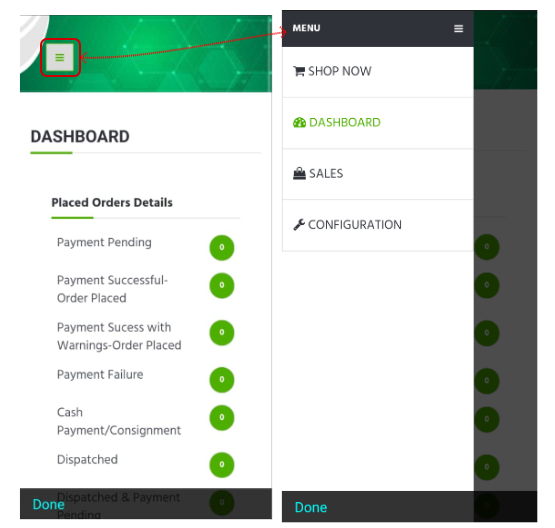
Customers can view the dashboard menu. Just click this button to view SHOP NOW, DASHBOARD, SALES, CONFIGURATION.
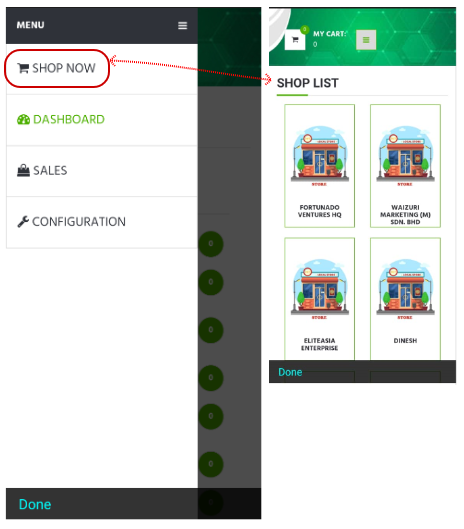
FUNCTION OF SHOP NOW:
Click the SHOP NOW button and it will go back to shop list.
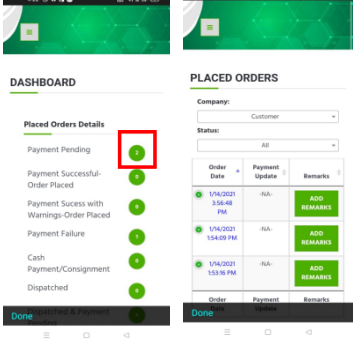
FUNCTION OF SALES:
SALES can view the placed order which you can see all your order items.
Step 1: Just click the Sales button on Dashboard menu.
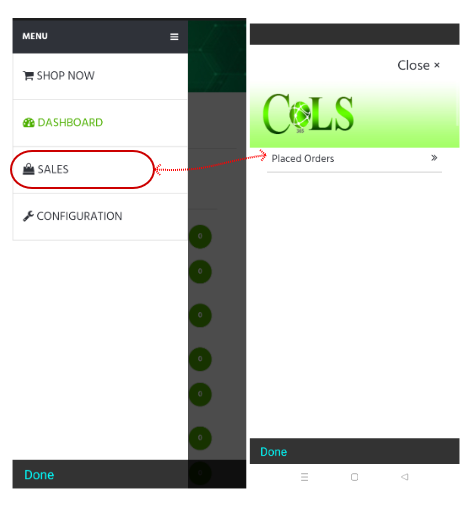
Step 2: Click Place order.
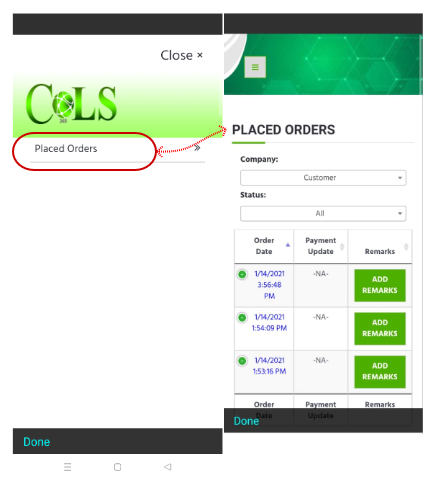
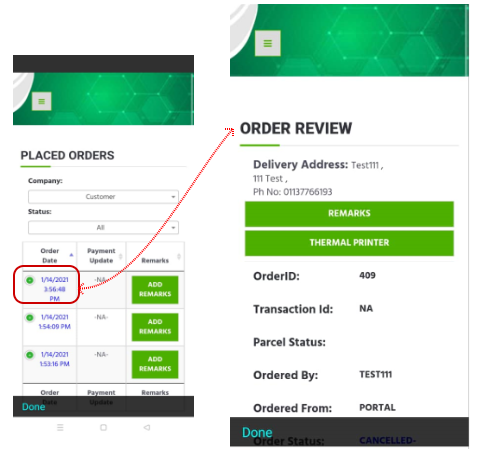
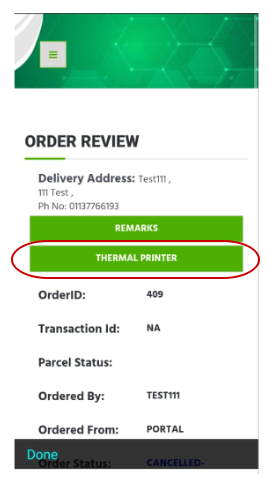
Step 3: Customer can review the item he/she order and the order status, just click order date.
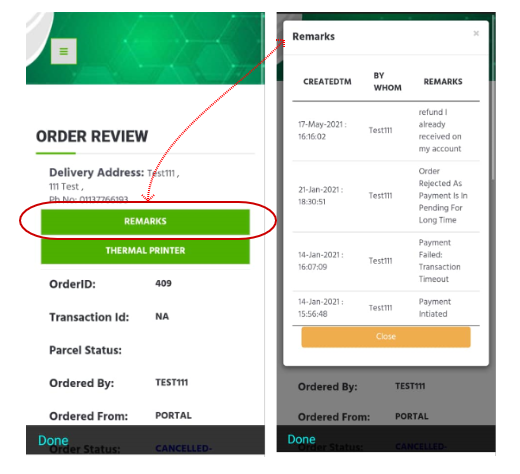
Step 4: Customers can see history on remarks, just click remarks button.
Step 5: Customers view/print the bill [click thermal printer button].
FUNCTION OF CONFIGURATION:
CONFIGURATION can view the profile maintenance which you can update your account.
Step 1: Click Configuration on Dashboard Menu.
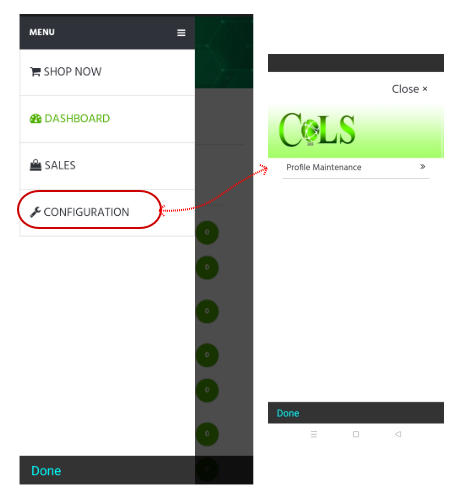
Step 2: Click Profile Maintenance.
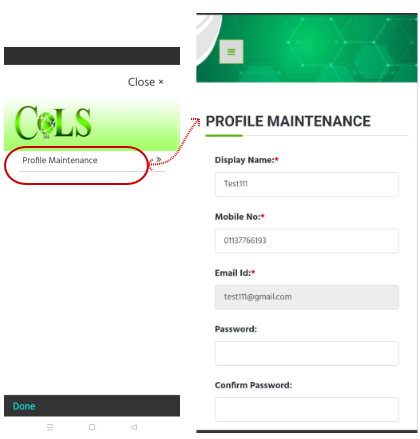
Step 3: Edit the details needed to change.
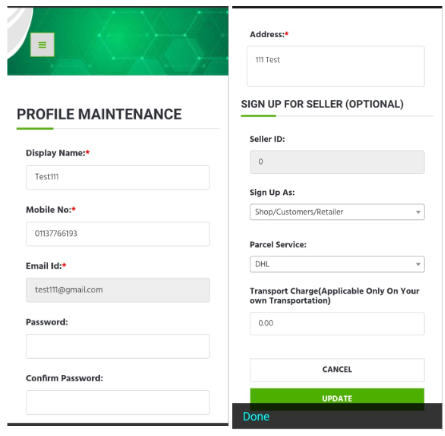
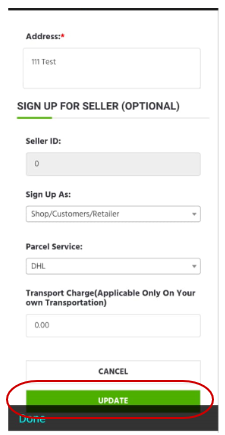
Note: Customer can upgrade as seller/distributor/manufacturer just change the SIGN UP AS seller/distributor/manufacturer.
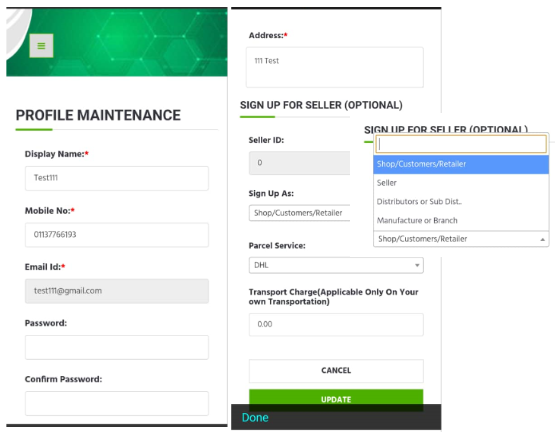
Step 4: Click the update button.
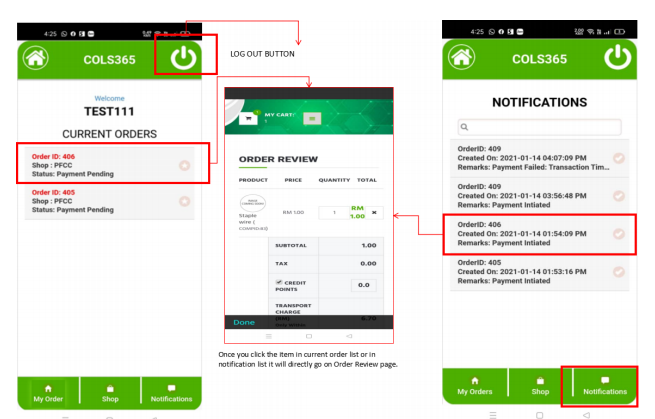
Once you log in your account or you log in as a guest account it will direct to shop list. If you want to view the HOME page click DONE below of shop list.
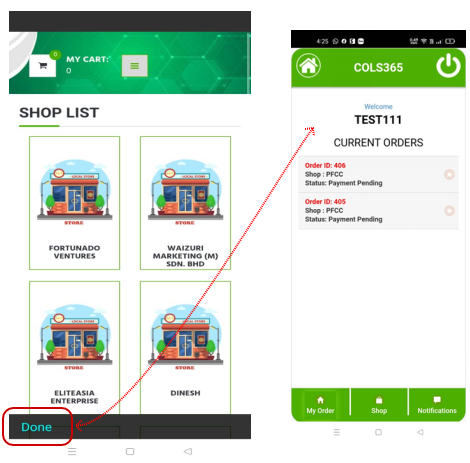
MOBILE APPS HOME PAGE screen can see your name, current orders list [click MY ORDER button], you can go back to shop list [click SHOP button] and can see your notification history [click NOTIFICATIONS button].