Allclaims RoadRanger
Web Portal
Adding New Company
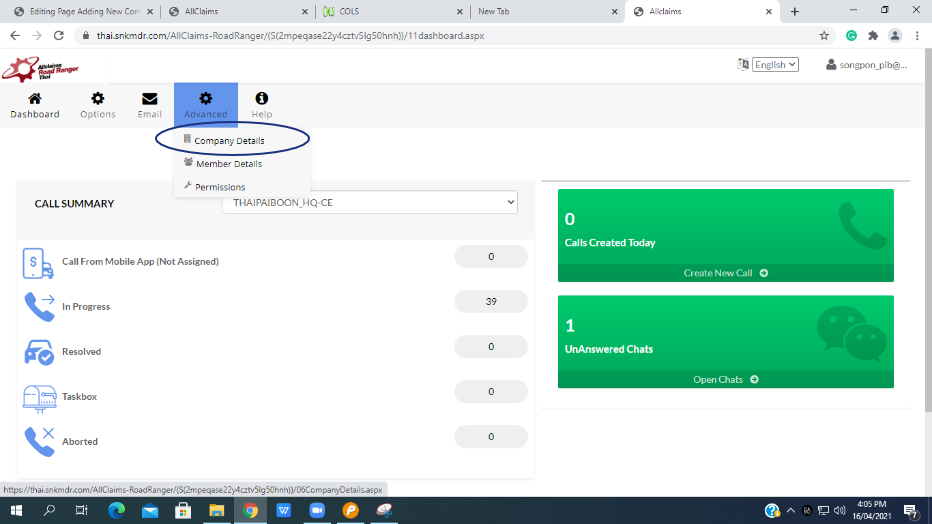
STEP 1: Go to ADVANCE on the dashboard.

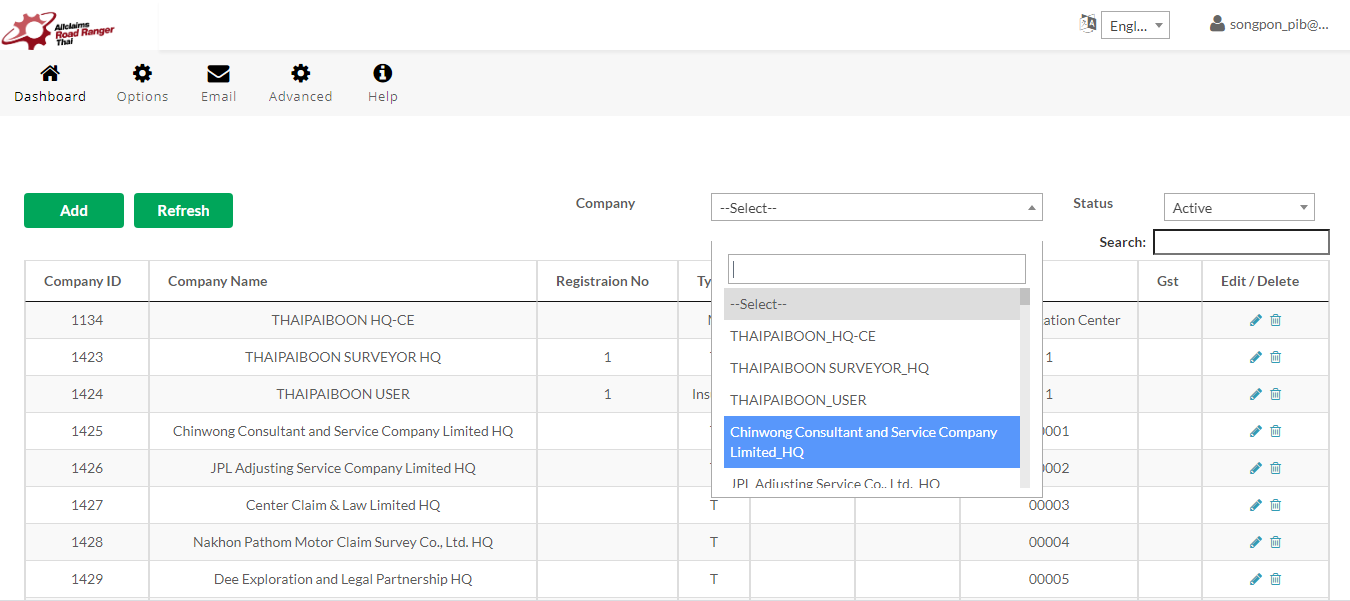
STEP 2 : Select Company Details.
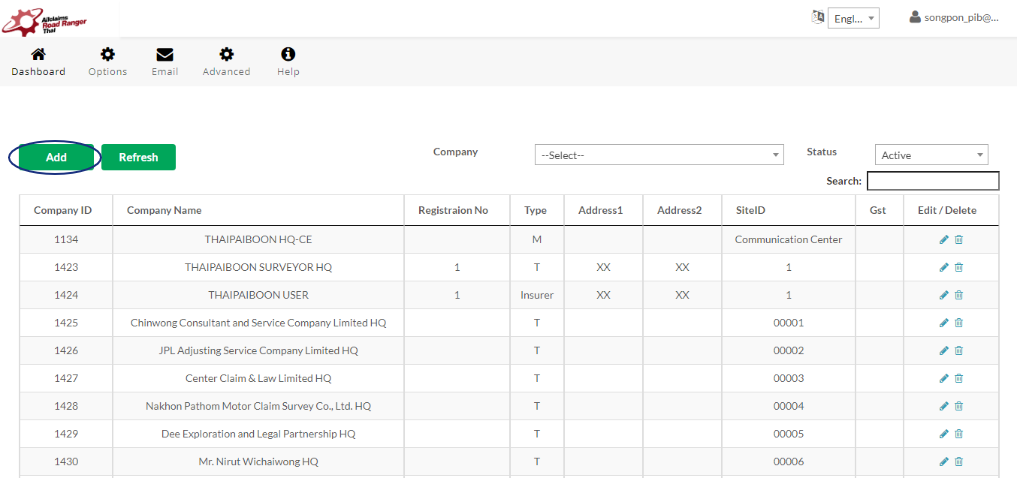
STEP 3: Click Add Button.
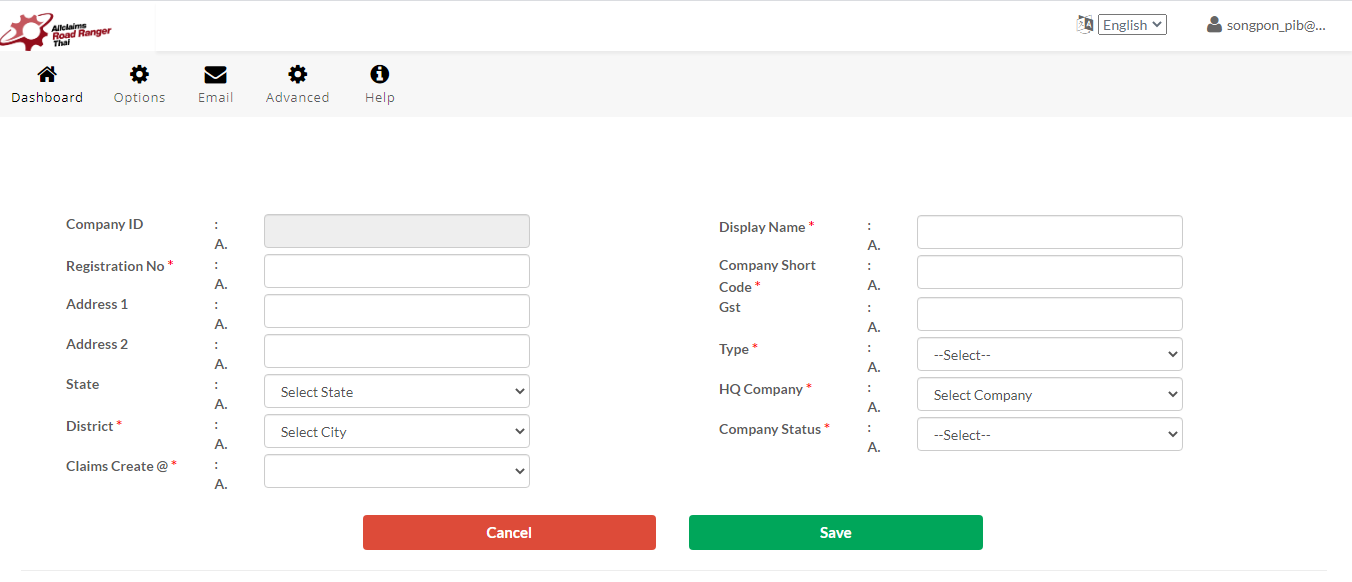
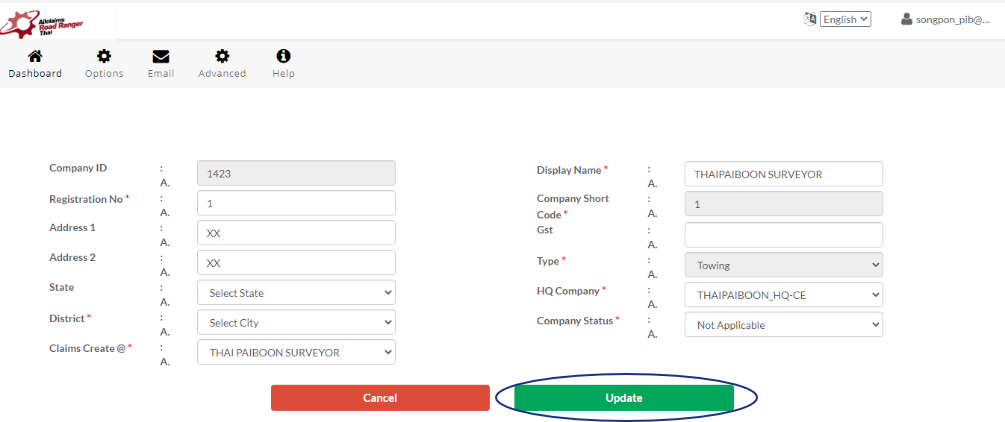
STEP 4: Fill up the form. Note: Company Type is either Call Center/Towing/User; Claim Create @ is by default you can select your company.
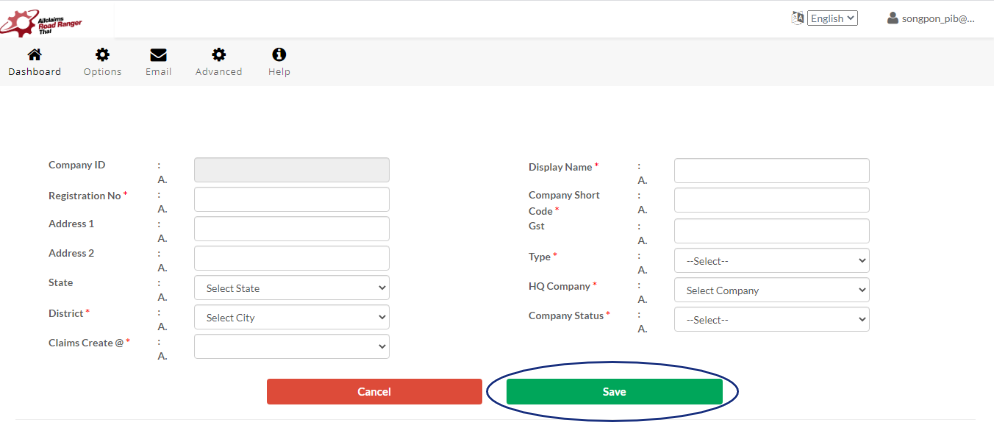
STEP 5: Click Save and it will go back automatically on Company List. Then to verify if added already just select on the company bar and type the company you added.
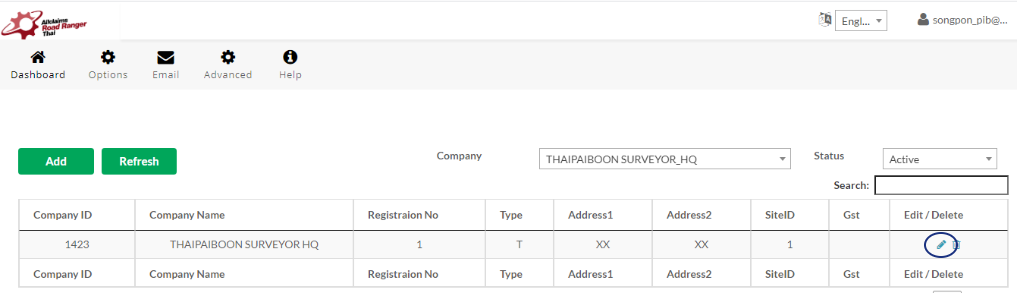
Note: Incase need to edit a company details click the pen icon on the right side. Then after finshed updating the details, just click update button and it will automatically go back on company list screen.
Adding New Members
STEP 1: Go to ADVANCE on the dashboard.

STEP 2: Select Member Details.

STEP 3: Click Add Button.

STEP 4: Fill up the form.
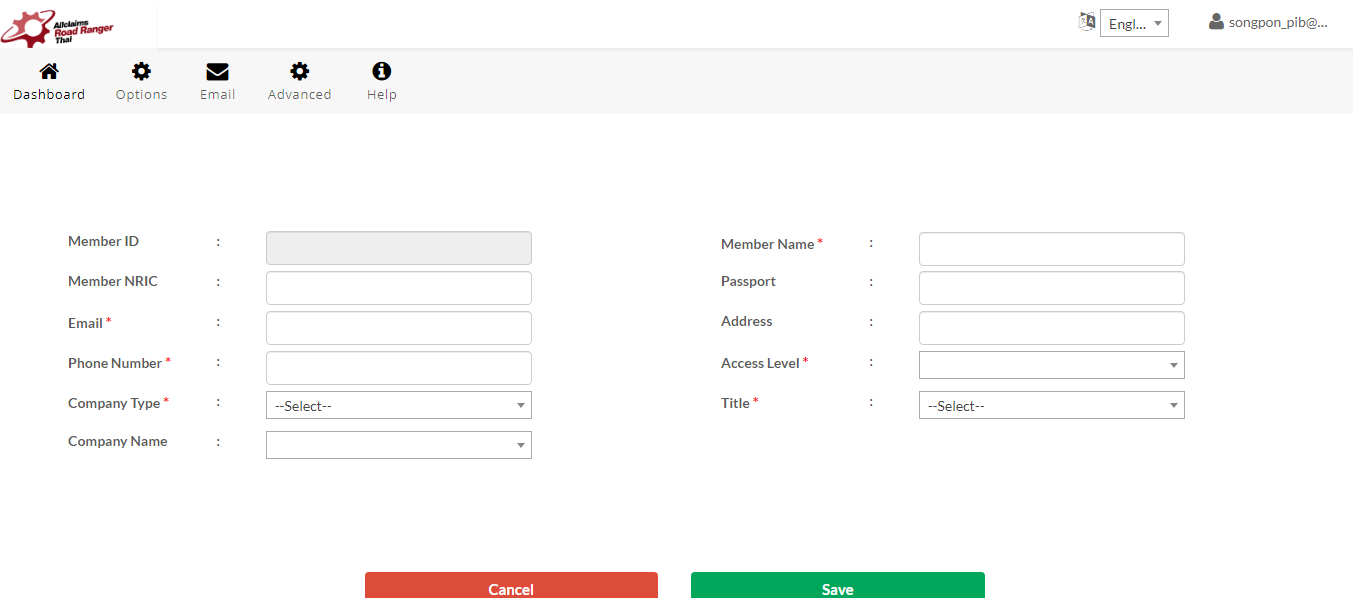
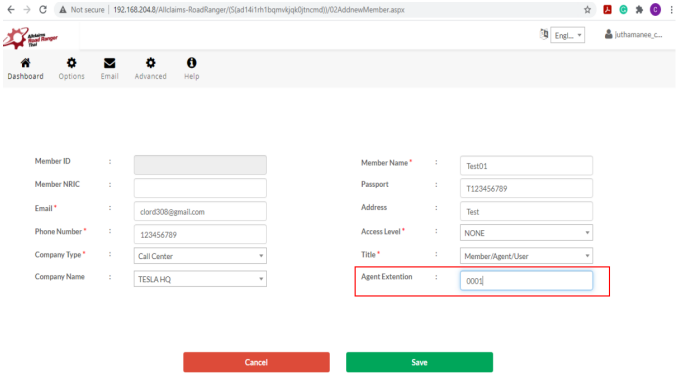
If you select (company type) as call centre, then an Agent Extention is mandatory;
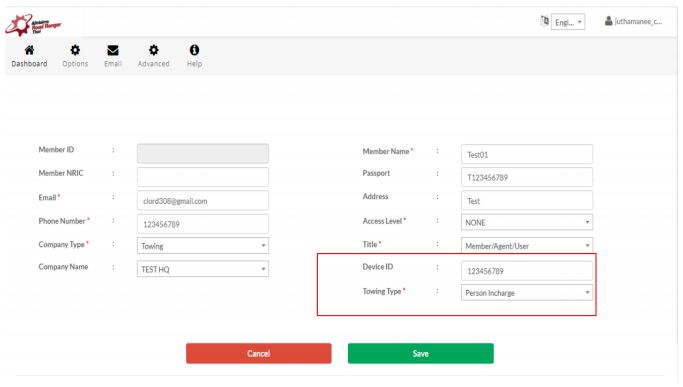
If you select (company type) as Towing, then Device ID is mandatory; copy the member phone number in that field and Towing Type as the person in charge or driver] need to be updated;
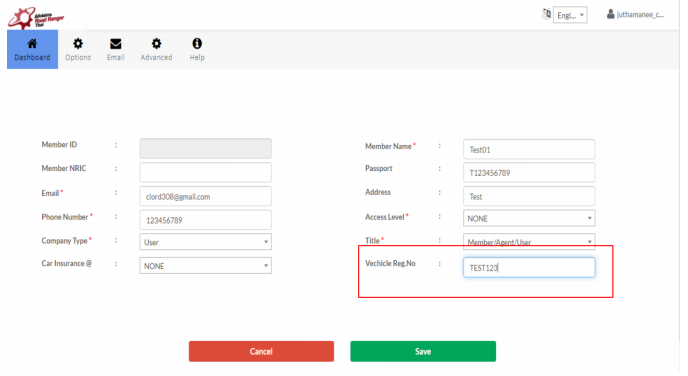
If you select (company type) as User, then vehicle reg is mandatory.
STEP 5: Click save button to save details; an email will be triggered to the email ID specified; follow the email instruction to reset the password to use the system.
Note : Please check your spam just in case.


Incase need to edit member details click the pen icon on the right side. Once finished updating the details, click the update button. On successful update, a message MEMBERS DETAILS UPDATED SUCCESSFULLY! will appear else look for an error message.

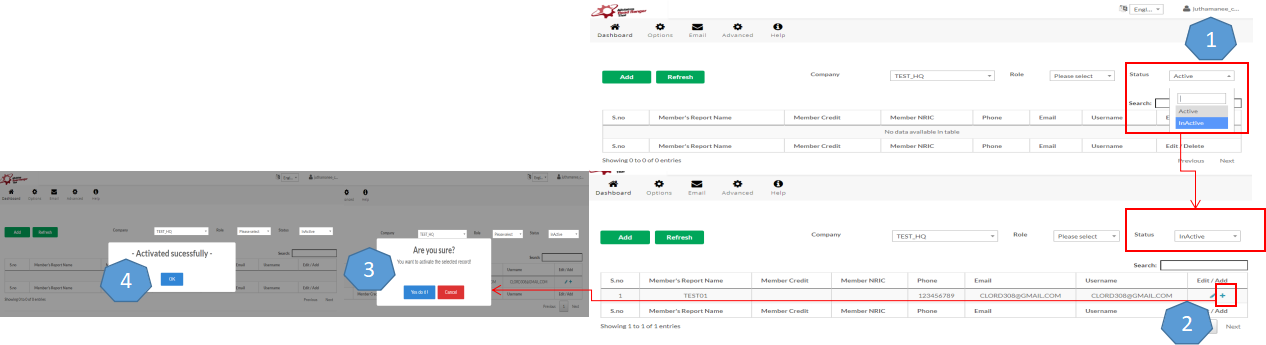
Incase need to delete member details click the Dash Bin icon on the right side. On successful delete member will be moved to Inactive status.
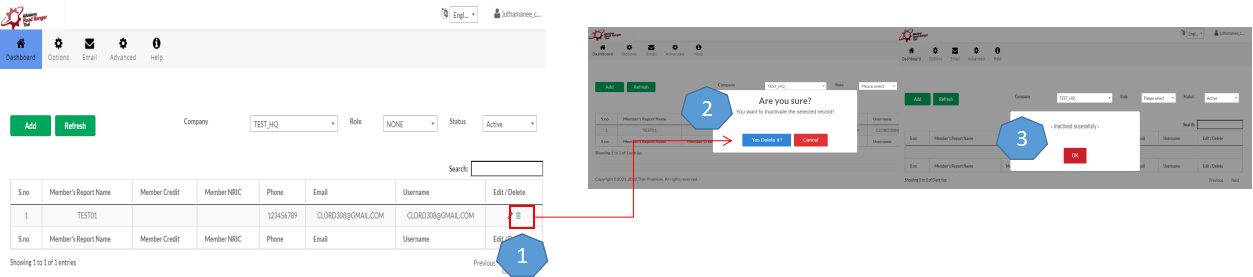
You can always add back the member from inactive status to active by following below steps.
Creating a New Call/Job
Step 1: On the HOME page, click create a new call.

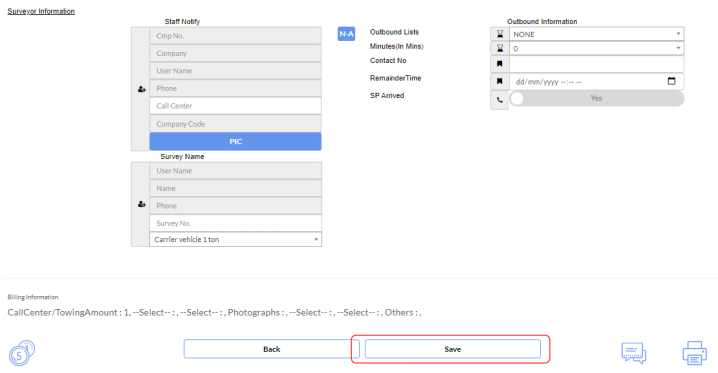
Step 2: Fill up the form [customer and protection information, GPS Location, Call Location, The Bill and Survey Information].
Customer Information, Protection Information and GPS Location:

Once you put the vehicle # you can click the search icon on the right side to verify if already have given insurance details before on us.

Then if have recorded already just click it and it will automatically fill-in the chassis number, policy number, Policy Type, Protection Date and Car Brand.

Call Location and Billing:

Survey Information:
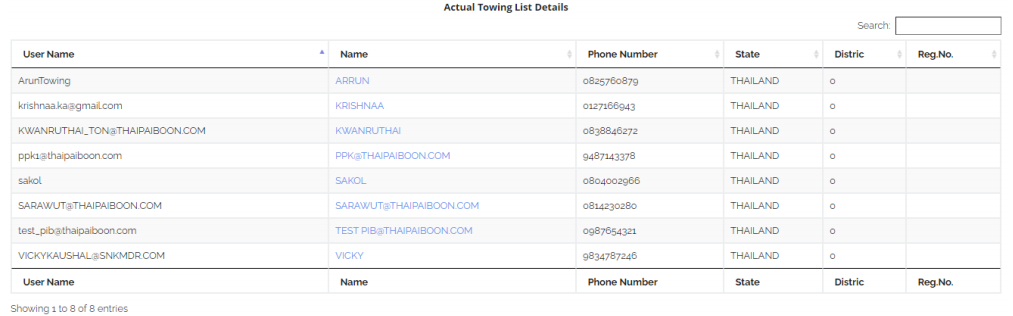
Select state on SURVEY LIST page:
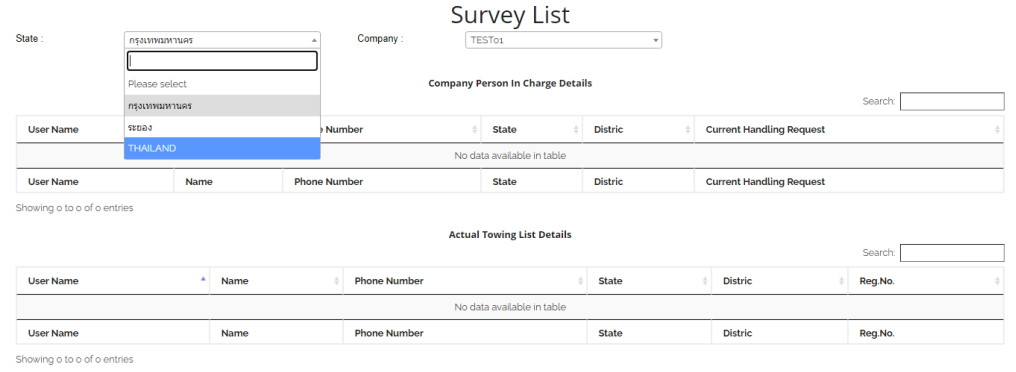
It will appear the company person-in-charge and actual towing list details. First must select the company person-in-charge and take note choose the name that highlighted/bold on the list.

Once you select already the name it will pop-up a message and click ok.
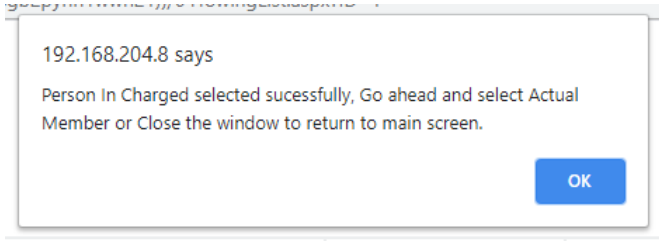
Second, for the actual towing list can select any person/driver you want to do the job.
Step 3: Click the SAVE button. It will show a pop-up message and click ok.
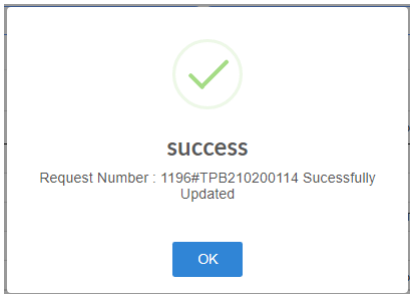
Then it will show the record at the bottom.

At the same time the customer and towing driver will receive a message on their mobile with regards to the new job created. And Towing Driver can receive new job notification on road ranger mobile app. [Go to All Claims Road Ranger Mobile Apps to know how it works]

Mobile Apps
Allclaims Road Ranger Mobile App
HOW TO INSTALL THE ALLCLAIMS ROAD RANGER APPS:
Step 1: Go to play store and Search the Allclaims-TH.

Step 2: Install the All claims-TH

LOG-IN ON ALLCLAIMS ROAD RANGER MOBILE APPS:
Step 1: Type your username and password
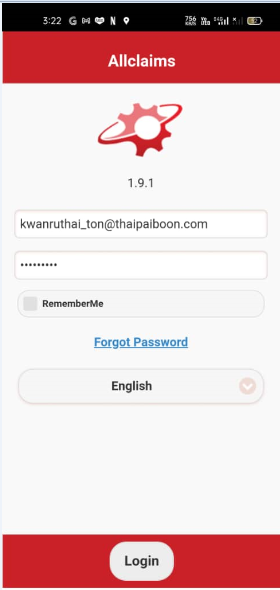

Note: If you want to remember your username and password you can click the box beside RememberMe. If you forgot the password you can click Forgot Password Button. You can select also the languange if you want THAI or ENGLISH.
Step 2: Click the log-in button.

PARTS OF HOME PAGE:
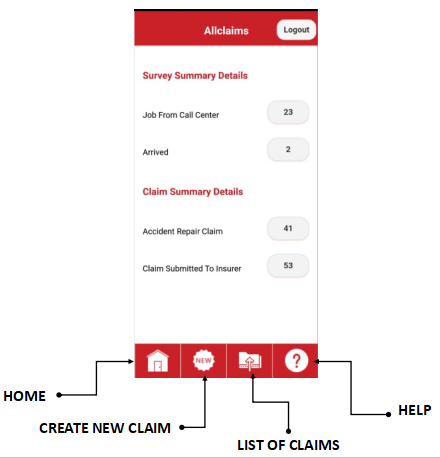
HOW TO ACCEPT NEW JOB:
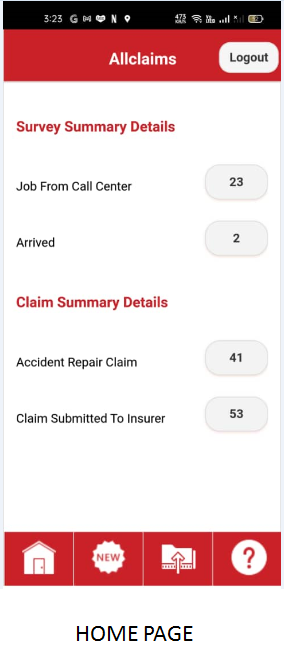
Step 1: On home page, you can see all the Survey Summary Details [Job From Call Center and Arrived] and Claim Summary Details [Accident Repair Claim and Claim Submitted to insurer].
Step 2: All new job can see on Job From Call Center.
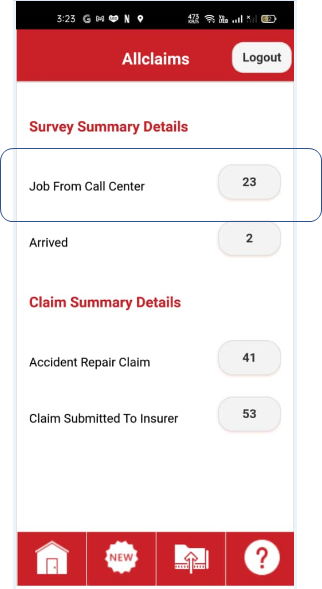
Step 3: Click the total number on Job From Call Center to view all the new jobs.

Step 4: Find the new job you need to do and click it to view the map location of the customer.

Step 5: Once you arrived on the place, Click Arrived Button to confirmed that you will do the towing. Then pop-up confirmation message appear and click yes.

Step 6: Once you finished the job, Go to Arrived and Click the total number on Arrived to view the JOB ID.

Step 7: Select the Job ID you done and click finish button.

Step 8: Then pop-up confirmation message appear and click yes if you completed your survey.

HOW TO MAKE ACCIDENT REPAIR CLAIM:
Step 1: On the home page, click the total number of Accident Repair Claim to view the list of claims.

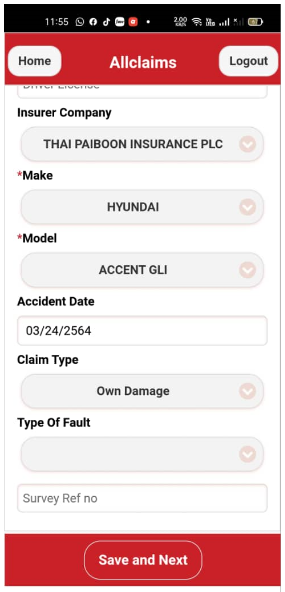
Step 2: Find the Claim ID that you need to do and click it. Then Accident Repair Claim details will show.

Step 3: Verify all the details and fill up the necessary details. Make sure select the claim type properly.

Step 4: Once done fill up click save and next button below.
Step 5: Add third party if needed. Just click Add Third Party button.

Step 6: Select damage type and loss type. Then type the estimated damage amount.


Step 7: Once done just click Save Third Party Data button. Then a pop-up message will appear and click yes

Step 8: Any details you need to edit just click pen icon on the right. And after edit just click update third party data button below and a pop-up message will appear then click yes to proceed.

Step 9: In case you need to delete the Third Party just click the "-" button. A pop-up message will appear then click yes to proceed.

Step 10: For uploading incedent or damage photos just click the camera button on the right side if added more third party or click Upload Photos button below the screen if one third party only specified. Uploading photos got 2 options, gallery button [if photos already save on the phone] and camera button [if photos not yet taken]. Once you done uploading photos pop-up message will appear.

Step 11: Click Submit button to submit the claim. Then a pop-up message will appear and click yes to proceed.

HOW TO CREATE NEW CLAIM ON MOBILE APP:
Step 1: Click the NEW button below.
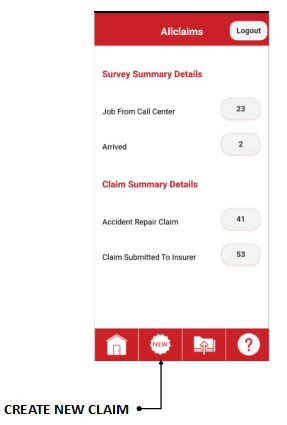
Step 2: Fill up all the details and click CREATE button below.

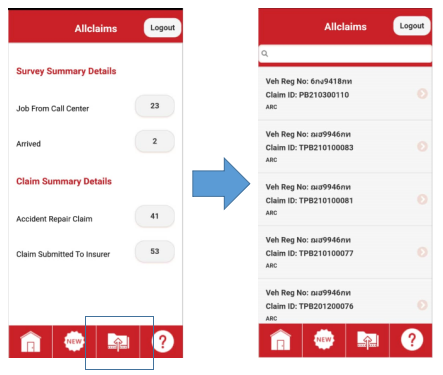
HOW TO VIEW ALL CREATED CLAIMS:
Click the folder below and it will show the list of claims.
NEED ASSISTANCE:
Click the question mark button below and put your issue on the box and then click submit button.
